Our Striping Process
Most good striping jobs are won before the paint hits the pavement. We plan the work window, measure the layout, protect nearby surfaces, and keep reopening in mind.
From Walkthrough To Final Check
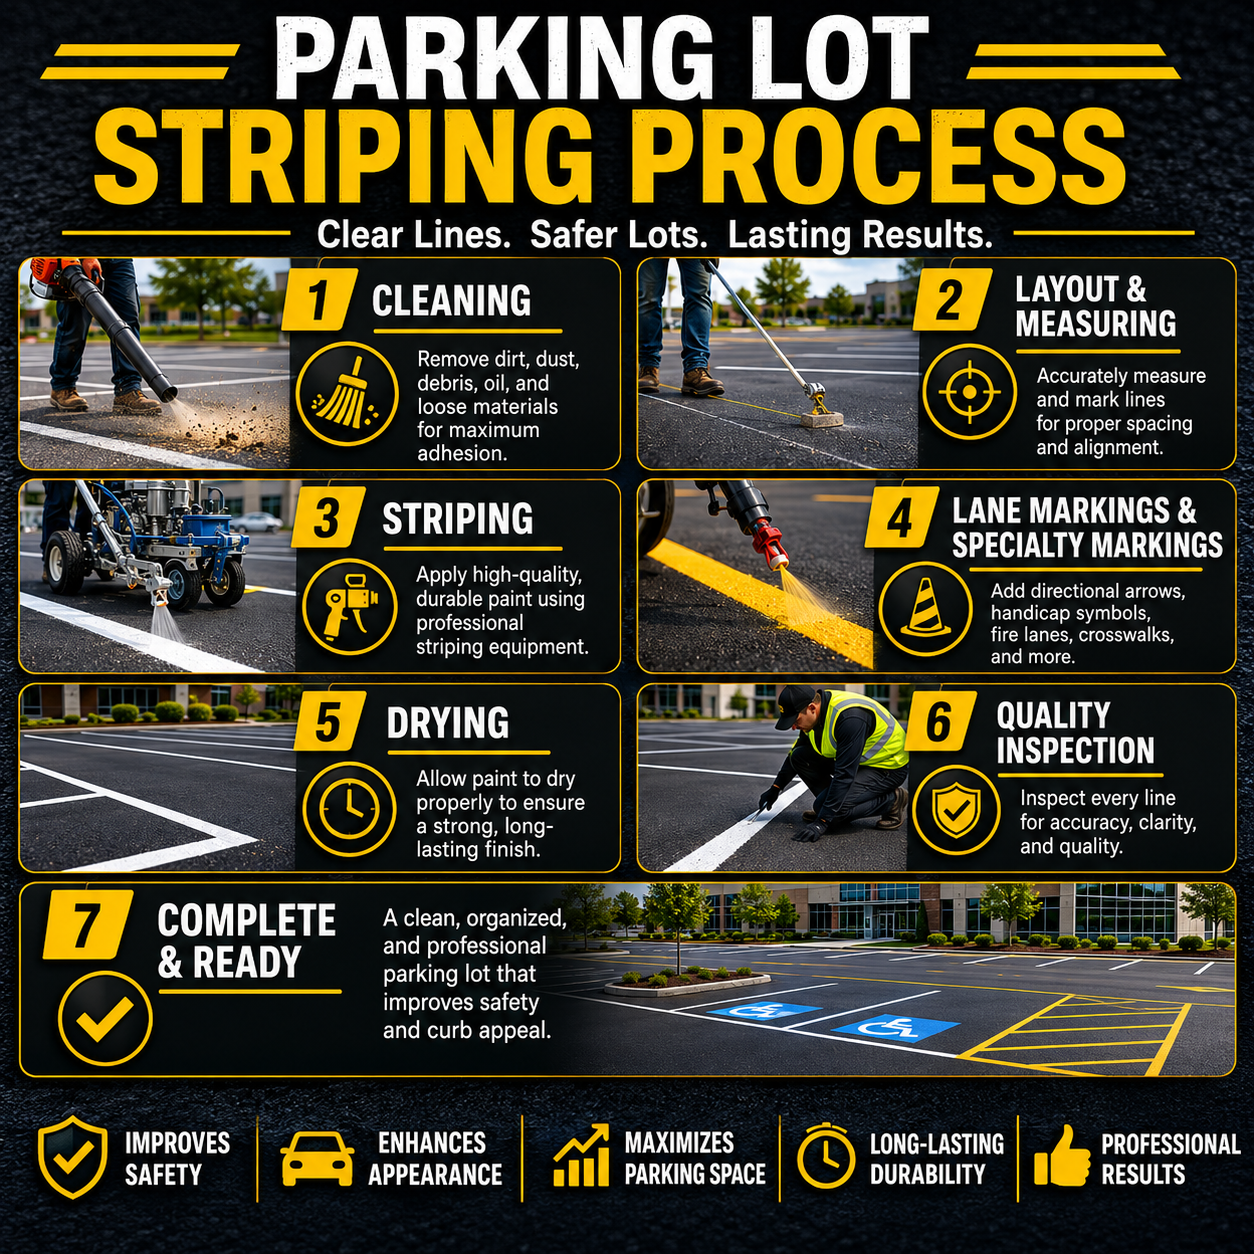
Site walkthrough: We review entrances, drive aisles, worn markings, tenant traffic, loading docks, ADA stalls, fire lanes, drainage, and pavement condition.
Measurements and layout planning: Existing lines are checked for spacing, traffic flow, wheel-stop placement, access aisles, crosswalks, and directional arrows. If the layout is confusing, we discuss corrections before chalking.
Surface prep: Loose debris, dirt, salt residue, and problem areas are addressed as much as practical. Oil-stained or failing pavement may need additional discussion because paint only performs as well as the surface allows.
Chalk layout and stencil alignment: We snap or chalk reference lines, set stencils, check ADA symbols, and line up arrows or lettering so markings look intentional from the driver seat.
Striping application: Paint is applied with attention to line width, paint thickness consistency, clean starts and stops, overspray prevention, and correct color placement. Reflective beads or thermoplastic may be used where specified.
Drying, curing, and reopening: Dry time depends on pavement temperature, humidity, shade, wind, and season. We talk through cone placement and when vehicles can return.
ADA verification and final inspection: We check accessible spaces, access aisles, hatch marks, fire lane visibility, arrows, stop bars, and obvious missed spots before wrapping up.